
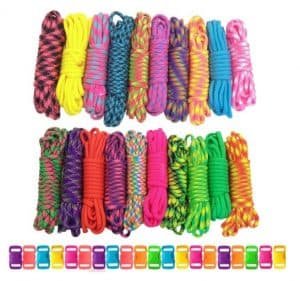
Every prepper and survivalist owns at least one paracord bracelet or paracord grenade. It’s one of the most basic pieces of survival gear. It’s cheap and readily available. In fact, you can get one from retail and specialty stores across the country. A paracord is useful in a ton of ways that there are tons of simple paracord projects you can do on your own.
Paracord Survival Bracelet

You probably already have a paracord bracelet that you bought somewhere. Even if that’s the case, it doesn’t hurt to make one on your own. In fact, if you’re looking for gifts to giveaway to your loved ones, paracord projects like this survival bracelet are just what the doctor ordered.

To make your own paracord bracelet, you need to measure your wrist first. Get the size of your wrist in inches then divide it by 0.17. This will be the length in inches of the paracord you will need.
Paracord Watch Strap

If you can make paracord bracelets, you can definitely do these watch strap paracord projects. All you need is a 550 paracord, an old wristwatch with a worn out strap or one that you would like to replace, and a pair of forceps. Plus the other stuff such as scissors, lighter and a buckle.
After measuring, cutting and melting the tips of the paracord, loop it through the female end of the buckle. Make sure you have around 20 inches of cord for the short end. The long end is, of course, longer than that.

Take both ends and pass it through the pins and under the watch then loop them two ties on the buckle’s male end. This is the perfect time to measure the cords against the diameter of your wrist. Pass the two ends through the pins and under the watch again. Continue weaving and tightening the long end over and under the cords. Check this out to see the actual pattern. Use the forceps to get the sorter cord. Pull it under the three loops. Before cutting and melting.
Paracord Belt
If you want to carry more paracord than what a bracelet or wristwatch can offer, do paracord projects such as a belt. You’ll need about 50 feet of paracord for a waistline of 32 inches, a belt buckle, a pair of scissors, lighter, and a skewer.
First, measure your waist so you get an idea of how much paracord you need. Burn the tip of the paracord so it won’t fray while you’re making your DIY belt. Loop the paracord through the belt buckle four times. Make sure the loops are loose enough for the paracord to pass through. Tie the end into a knot to secure the paracord to the belt buckle. Start weaving. To know how, check this out. After weaving, cut the paracord, tie a knot, and burn the end so the rope won’t fray. There you have it. You now have a paracord belt to keep you trousers up and help you in survival situations.
Paracord Knife Grip

Survivalists love wrapping the handles of their knives in paracord. It gives them a better grip and ensures they have enough paracord to use in emergency situations. This is also a good paracord project if you have knives with broken handles.
Easy Wrap
There three ways to go about with your knife grip paracord projects. First is the easy wrap. You just need to tape the paracord to the handle or tang near the blade. Make sure the paracord extends through the length of the handle. There should also be excess cord hanging off the tip of the handle. From the part with the tape, wind the cord around the handle. The loops should be side by side and not covering one another. Once you reach the end, cut the paracord and tie it securely to the handle.
Crisscross
For the basic crisscross wrap, you need a long piece of paracord, about two to five times longer than the handle. Place the part of the handle that’s near the blade on top of the middle of the cord. Loop the left tip of the paracord over the handle then slip it under the right end to make a crisscross or “X”.

Take the right tip and push it back through the loop. Slip the other end into the loop from the back then draw it back through to the left side of the handle. To secure the loop, slip the same cord end through the bottom of the loop and out the top. Pull to tighten the loop.
Sword Style
As the name implies this kind of wrap is popular among bladesmiths and sword users. It’s done by first making a loop out of the paracord. Tape the looped part on the flat side near the tip of the handle. Tape the parallel lines of paracord onto the part of the handle near the blade.

Grab the right tip of the cord and loop it through the backside and over the taped part of the left cord. Slide it under the right cord and pull. Take he left end then loop it from the backside and over the right cord. Make an “X” by placing it over the other cord (the one you slid under the right cord in the previous step) then slip it under the left cord. Pull to tighten. Repeat the two steps until you reach the end of the handle. Weave the two ends of the cord together then tie them together.

A simple search on paracord projects and you’ll be bombarded by lots of different ways you can use this essential piece of survival gear. You can make dog collars, hammocks, snares, and monkey fists, among others. If you know more ways of using a paracord, please share them in the comment section. Over at The Gentleman Pirate, you can learn how to use the paracord in survival situations. Plus, you’ll learn other survival gear you can definitely use in the future.
Just a disclaimer – We have partnered with these companies because we use their products and/or proudly trust and endorse them – so we do receive a commission if you make a purchase or sign up for services.
Often, we are able to negotiate special discounts and/or bonuses, which we will pass on to you via our links. We often get short notice on sale items available for 24-48 hours as we will pass these savings onto you.