


Water scarcity is a serious problem across the United States, as well as in many parts of the world. According to the World Economic Forum, an estimated 2.2 million people in the country lack access to running water and essential indoor plumbing while around 44 million suffer from insufficient water systems. That said, many homeowners can’t afford to start a garden simply because they can’t afford to waste precious water on plants. One solution to this ongoing water crisis is to build a rainwater collection system at home.
Collecting rainwater has become a common practice for people who want to save money on their water bills. It’s also popular among those who are looking for ways to reduce their ecological footprint and contribute to a greener future. If you build a rainwater collection system at home, you can conserve water resources and promote sustainability while lowering your utility bills. So if you’re looking for a more affordable and environmentally friendly way to water your garden or farm and clean your outdoor area, setting up a rain barrel system at home is a great option.
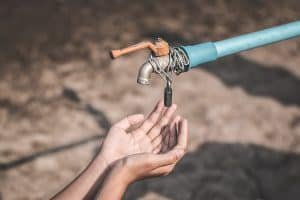
What is A Rain Barrel System?
A rain barrel system is a type of rainwater harvesting system that captures and stores rainwater runoff from rooftops and other hard surfaces. The system typically includes a large barrel or container to collect the rainwater, which can then be used for watering plants, lawns, and gardens.
Rain barrels are usually made from durable materials like plastic or metal and often come with a cover or screen to prevent debris, insects, and animals from entering the barrel. They’re often connected to downspouts from gutters, which direct rainwater from the roof into the barrel. An overflow valve or hose diverts excess water away from the barrel when it’s full while a spigot or tap at the bottom allows for easy access to the stored water.
[lookbook id=”88388″]
What are the Benefits of Having A Rainwater Collection System at Home?
If you’re still not sold on installing your own rain barrel system at home, here are some reasons why you should:
Helps the environment
Collecting rainwater reduces the amount of water that you use from municipal water sources, which can reduce your environmental impact. This is especially important in areas with water scarcity or where water is expensive.
Saves you money
Rainwater is free. You only have to spend on the materials needed to build your rain barrel system, which is relatively inexpensive. By using collected rainwater to water your garden and clean your outdoor space, you can reduce your water bill by a significant percentage.
As a matter of fact, the US Environmental Agency (EPA) says that homeowners can save up to 1300 gallons of water on average by using a rain barrel system.
Reduces dependence on municipal water supplies
Aside from the cost savings, having a rain barrel system also reduces your dependency on public water systems. It also lowers the amount of water that is being treated and discharged back into our rivers and streams. This is especially important during emergencies such as drought, heatwave, and other extreme weather disturbances during which the need for freshwater increases.
Promotes plant health
Rainwater is naturally soft and free of the chemicals found in municipal water supplies, which can be beneficial for the health of your plants. Rainwater also contains nutrients that can help promote plant growth.
Reduces erosion
Collecting rainwater can help reduce erosion in your yard and surrounding areas. Capturing rainwater can prevent water from flowing down slopes and carrying away soil and other materials.
Reduces runoff
Collecting rainwater can also reduce stormwater runoff, which can help prevent flooding and water pollution. By capturing rainwater, you can reduce the amount of water that flows into storm drains and streams.
What Do You Need to Build A Rain Barrel System?
Building a rain barrel system is relatively simple and requires only a few essential items. Here are the items you’ll need to build your own rain collection system:
1. Rain barrel or container
Rain barrels can be made from any watertight container, such as a plastic trash can or large bucket. You can also use a repurposed food-grade plastic barrel or purchase a new one specifically designed for rainwater collection.
There are a few qualities that you should consider when looking for a rain barrel. One is durability. Rain barrels should be able to withstand the elements and last for many years so choose those that are made of food-grade plastic, heavy-duty wood, or other sturdy materials.
They should also be resistant to UV rays since they’ll be outside and likely exposed to the sun. Prolonged sun exposure can cause plastic to break down over time, which can lead to leaks and other problems.
You also want a barrel that’s large enough to store an ample amount of rainwater. A barrel that can keep at least 55 gallons of water should suffice but if you have space for a larger one or more than one barrel, then go for it.
Finally, you want your rain barrel to be as pleasing to the eye as possible. It’ll be part of your home’s landscaping, so be sure to choose one that complements the surrounding area.
2. Downspout diverter
A downspout diverter is needed to redirect the rainwater that falls on the roof and eventually into your rain barrel. As the rainwater flows to the gutter and down the downspout, the diverter will send it toward your barrel instead of out into the ground.
Before buying a downspout diverter, make sure it’s compatible with your existing gutter system. Another important feature to consider is the diverter’s flow rate. Some diverters come with an adjustable flow rate, allowing you to control the amount of water diverted to the rain barrel. You also want one that can withstand exposure to the elements. It should be able to handle a heavy rainstorm without overflowing or clogging.
3. Hose or pipe
Diverter kits usually include a downspout extension such as a hose or pipe, as well as an elbow connector, a hose clamp, or other parts. If they’re not included in your purchase, you’ll need to find a downspout extension that’s compatible with your diverter. Also, check first if the hose is the right length for your rain barrel system. Otherwise, you may need to buy a longer one or adjust your system accordingly.
4. Mesh screen or filter
A screen or mesh filter is needed to keep leaves, insects, and other debris from entering the barrel and contaminating the water while also preventing clogs. The filter should be made of a heavy-duty material that won’t easily tear. You also want one that’s large enough to cover the barrel’s opening and fit snugly so that nothing gets into the rainwater collection system.
5. Spigot or tap
You’ll also need to install a spigot or tap at the bottom of your barrel so you can access the stored rainwater. Make sure it’s securely tightened, as loose connections could allow water to leak out. Additionally, consider installing a second valve or drain hose for purposes such as cleaning and maintenance.
6. Overflow
During heavy or prolonged rain, your rain barrel will be filled up eventually. Once it reaches capacity, the excess rainwater will spill over and flood the surrounding area. This increases the risk of flooding and water damage to your property, particularly to your home.
An overflow hose is designed to prevent this. It typically consists of a pipe or spout located near the top of the barrel, strategically positioned to allow water to escape when the barrel is full. The overflow pipe is connected to a downspout or drainage system that carries the excess water away from the immediate vicinity of the barrel and into an appropriate drainage area, such as a stormwater drain.
Most rain barrel systems available on the market come with an overflow pipe and a hose connector, so make sure to check if they are included in your purchase. But if you’re building your rain barrel system from scratch, you’ll need to make the overflow yourself. You just have to drill a hole near the top of the barrel and attach a hose or pipe.
7. Waterproof sealant
Use high-quality sealant or silicone caulk to fill in any gaps between the different parts of the rain barrel system. It’s easy for water to seep through small holes, cracks, or gaps, which can lead to leakage and water damage. Applying sealant not only strengthens the barrel but also helps prevent any water from escaping. Make sure to use a waterproof type of caulk that won’t be easily washed away by rain or exposure to other elements.
Teflon tape is also a must when dealing with threaded connections. Like sealants, Teflon tape prevents leakage, but it also makes it easier to remove and tighten threaded connections.
8. Rain barrel stand
Ideally, you want your rain barrel system to be elevated from the ground. For one thing, it’ll be easier to access the spigot and gather water. Also, your barrel won’t be in direct contact with the ground, which can be a breeding ground for bacteria and other contaminants. Plus, you may need to clean your barrel more often since it can get muddy down there.
For this, you’ll need to construct a stand or buy one of the many rain barrel stands available on the market. Or if you’re feeling creative, you can create your own stand using bricks, wood planks, or cinder blocks. Just make sure to use leveling blocks or bricks on uneven ground and secure the barrel to the stand.
9. Tools
Some basic tools you’ll need to build a rainwater collection system include a drill with a hole saw attachment, a hacksaw or jigsaw, sandpaper or a file, and a screwdriver to attach fittings. You may also need a wrench to secure the spigot and other parts. A measuring tool and marker are also needed for measuring the cuts and marking the size of the holes. Make sure you also have a ladder or step stool so you can work safely at heights. Safety gear such as gloves and goggles are also necessary.
10. Cleaning supplies
If you’re repurposing a barrel or container, you need to clean and sanitize it first. You’ll need items such as a pressure washer, scrub brush, clean rag or absorbent cloth, disinfectant soap, bleach or sanitizing solution, and water for cleaning. You should also have vinegar and baking soda on hand in case you need to dissolve any mineral deposits that might be present in the barrel. If you’re using new parts, make sure to wipe them down with a damp cloth and mild detergent before installation.
11. Optional items
There are a few optional items you can add to your rain barrel system such as a floating filter disk or a pump for irrigation purposes. Each of these items will give you added control over the water being collected in your barrel. And if you’re planning on using more than one rain barrel, you’ll need additional hoses and connectors.
It’s also a good idea to attach a gutter guard or fine mesh to your gutter to further prevent debris from getting into your rain barrel. It also helps prevents your downspout from clogging allowing the rainwater to flow more freely.
A rain gauge is another optional but useful tool for monitoring rainfall amounts and getting a better understanding of when to expect overflow.
[lookbook id=”88391″]
How to Build A Rain Barrel System
Now that you know what you need to build a rain barrel system at home, you’re one step closer to collecting and storing rainwater for watering plants, washing vehicles, or other non-potable uses. If you’re using a store-brought rain barrel kit, you just need to follow the instructions but if you’re making it from scratch, this step-by-step instruction guide should help you build your own rainwater harvesting system:
Step 1: Select a suitable location
Choose a location near a downspout or gutter where you can easily install the rain barrel. It should ideally be close to the area where you plan to use the water, such as your garden. Another thing to consider is its proximity to your storm drain so you don’t need to run long hoses for the overflow.
Step 2: Purchase everything you need
By choosing the location first, you’ll get an idea of how many barrels or containers you can use for your rainwater collection system. You’ll also know how long your hoses and other connectors should be.
Rain barrels can be purchased at most home improvement stores or online. When choosing a rain barrel, select one that is the appropriate size for your needs and has a lid to prevent debris and insects from entering.
Step 3: Make sure the ground is level and compact
The ground right under your rain collection system should be able to support the weight of a full barrel. It should be level and compact to keep the barrel or barrels from becoming unbalanced or tipping over.
If necessary, level the ground first. Clear the area of any debris or foliage then use a shovel to level the ground. Apply sand or gravel to any low spots and tamp down the surface with a tamper or a plate compactor if you have access to them. If not, just stomp the ground with your feet until it’s firm and stable.
Step 4: Prepare the barrel
It’s crucial to clean it thoroughly to remove any dirt, debris, or harmful chemicals that may still be present, especially if you’re planning to use the water for consumption. Before cleaning the barrel, wear protective gloves and eyewear just in case there’s harmful residue left.
Rinse out the barrel with a pressure washer to dislodge any dirt or debris. Next, scrub and wash it thoroughly with clean water and a mild soap solution. You can also use vinegar or baking soda to remove any stubborn spots.
Rinse the barrel out thoroughly with clean water then fill it with a solution of 1 cup of bleach diluted in 10 gallons of water, or any other approved sanitizing solution. Close the lid tightly and let it sit for at least two hours to allow the solution to disinfect the barrel thoroughly.
Next, drain the barrel and give it another good rinsing until all the soap, bleach, or sanitizer is gone. Wipe the barrel dry with a clean rag or cloth and let it sit in direct sunlight for an hour or two. This will help disinfect the surface and make sure’s no lingering bacteria.
Step 5: Install the downspout diverter
Measure the height of the barrel and mark a line on the downspout above the top of the barrel. This mark will indicate where you’ll cut the downspout to install the diverter or attach a hose. Make sure the mark is not too high for your downspout extension to reach.
Using a hacksaw or jigsaw, cut the downspout at the marks you made. Make a straight, clean cut. Then attach the diverter and gasket to your downspout using screws or bolts, depending on your diverter model. Finish it off by applying some sealant.
Step 6: Attach the downspout extension
After installing the diverter, attach one end of the flexible hose or pipe to the diverter outlet. Then attach or position the other end on the top of your rain barrel. Secure it with a hose clamp or any other suitable method.
In many cases, the hose is directly attached to a hole in the lid of the barrel. Some attach it to the side and near the top of the container, particularly if it has no lid. This will mostly depend on your preference and practicality. In both cases, you have to trace the size of the hose on the barrel before drilling the hole.
Step 7: Install the spigot
Drill a hole near the bottom of the barrel to install the spigot or brass hose bib. Use a hole saw attachment that matches the size of the spigot. Then insert the spigot and secure it with a washer and nut on the inside of the barrel.
Step 8: Install overflow
Drill a small overflow hole near the top of the barrel and attach a hose or pipe. Place the other end of the hose away from your home. Point it towards the storm drain. If you’re using pipes, use elbows and other fittings to keep the excess water from flowing back into your home. Apply water sealant where needed.
Step 9: Attach the mesh screen
If your barrel doesn’t have a lid, you’ll need a mesh screen to cover the opening and prevent debris from getting inside. You can purchase mesh covers that are specifically made for rain barrels. If you don’t have one, you can use a piece of hardware cloth or mosquito netting. Just make sure it fits perfectly and securely around the opening of the barrel.
Step 10: Elevate the system
It’s recommended to elevate your rain barrel system to make it easier to get water from the spigot. You can place the rain barrel on cinder blocks or another sturdy surface. If you have the materials, you can build a stand that’s fit specifically for your barrel. You can also adjust the length of the legs in case you can’t completely level the ground.
Step 11: Set up and test
Once everything is set up, you need to test your rain harvesting system. Turn on your water supply and fill the barrel. Check for any leaks, especially around connections and the spigot. See if the water flows freely through the spigot and overflow. Check the connectors if you built a multi-barrel system.
Step 12: Enjoy your rainwater collection system!
When it’s done, you can now enjoy the many benefits of rain harvesting. You can use the water collected in your barrel to irrigate gardens or wash cars and other outdoor items. Plus, you’ll be helping conserve water and reduce runoff in your yard.
How to Set Up A Rain Barrel System Without Gutters
If your home does not have gutters, you can still enjoy the benefits of a rainwater collection system. It can be a bit more challenging but it’s still possible with a little ingenuity. Here are some options:
1. Position the rain barrel strategically
The simplest way to collect rainwater without a gutter is to place the barrel where it can get the most rain. In other words, you just have to leave it outside in the open or right under your roof and hope it rains hard. It’s not really that efficient but it’ll eventually get the job done.
2. Use a tarp
A tarp will drastically increase the surface area that can collect rainwater. It’s a simple yet pretty effective method for collecting rainwater without gutters. Simply place a large tarp or plastic sheeting at an angle so that the water flows into your rain barrel.
Take note that not all tarps are created equal. Under constant exposure to the elements, some tarps may break down faster than others. Choose a tarp that’s sturdy and UV-resistant. You can also extend the life of your tarp by storing it when not in use.
3. Use a funnel
You can create your own funnel using PVC pipe and some fittings. This is a more complicated setup but it’s also much more efficient. You can create your own funnel by attaching PVC pipes to the eaves of your home, and then use the angled pipes to direct the rainwater into a container or barrel.
4. Install a rain chain
Hang a decorative rain chain from the eaves of your roof, positioning it so that it directs water toward the rain barrel. This is not only an easy way to collect rainwater without gutters, but it also looks attractive and adds a bit of charm to your outdoor space.
5. Build a rain saucer
The Rain Saucer is exactly what it sounds like. It’s a huge saucer-like contraption that makes it easier to collect rainwater. This system doesn’t need to be connected to a roof or gutter since you can just leave it in the middle of your yard or right under your roof where it can gather the runoff.
You can purchase the Rain Saucer, an invention of Tom Spargo, or make a version of it. If you want to build your own rain saucer system, you can use any saucer-shaped container like a wide basin with a shallow shape. You can also make one out of plastic sheeting, stakes, and rope. This system is a bit tricky to create but it’s still an effective way to collect rainwater without gutters.
How to Safely Harvest and Treat Rainwater for Drinking
If you’re planning on using rainwater for watering plants and cleaning your outdoor spaces, a simple rain barrel system will suffice. But if you want to collect water for consumption, washing dishes, or brushing your teeth, there are a few precautions and treatments that you should do to remove pathogens and other harmful contaminants. Here are some of the most effective methods of making rainwater safe for human consumption:
Filtration
First things first, you need to remove any kind of debris and impurities. Your rain barrel system is a good start since it has a mesh cover to filter the water. Follow it up with a more advanced filtration method, such as using a ceramic filter, activated carbon filter, or a combination of both. These filters can effectively remove bacteria, protozoa, organic compounds, and some chemicals. If you don’t have access to these filters, you can use a personal water filter like LifeStraw and Sawyer MINI.
Disinfection
Disinfecting rainwater is crucial to eliminate harmful microorganisms. The simplest way to disinfect filtered rainwater is to boil it for at least one minute. Boiling kills most pathogens present in the water.
Alternatively, you can use chlorine or iodine tablets that are specifically designed for water treatment. Another method is to use ultraviolet sterilizers or purifiers to treat rainwater. These devices use UV light to kill or inactivate deactivate microorganisms such as bacteria, viruses, and protozoa. It’s an effective method for water disinfection and has been widely used in various applications, including treating rainwater for consumption.
Reverse osmosis
While UV sterilization is effective against microorganisms, it doesn’t remove other impurities such as chemicals, heavy metals, or dissolved solids. That’s why the rainwater needs to undergo additional treatment steps such as reverse osmosis (RO). This water purification process involves pressurizing the rainwater using a pump making the water molecules pass through a semi-permeable membrane. Contaminants are unable to penetrate this membrane leaving you with water that’s safe to drink.
Common Rain Barrel System Mistakes
Although rain barrel systems are fairly simple, there are a few common mistakes that can lead to problems that impact the functionality, effectiveness, and durability of the system. Here are some of the common mistakes to avoid:
Lack of mosquito prevention
Without proper precautions, rain barrels can become breeding grounds for mosquitoes. Not using a tightly fitting lid, mesh screen, or mosquito netting can allow mosquitoes to access the standing water. Make sure to cover the opening of the barrel with a fine mesh screen to keep mosquitoes out.
Not considering the water demand
It’s important to assess your water needs and consider the capacity of the rain barrel system accordingly. If the rain barrel is too small for your water demands, it may fill up quickly, resulting in wasted rainwater during heavy rainfall events. Alternatively, if the barrel is too large for your needs, it may take up unnecessary space or be challenging to maintain.
Neglecting maintenance
Regular maintenance is essential to keep the rain barrel system functioning properly. Neglecting maintenance tasks such as cleaning the barrel, removing debris, and inspecting for leaks can lead to reduced water quality and potential damage to the system.
Using the wrong materials
Choosing inappropriate materials for the rain barrel or its components can cause durability and functionality issues. For example, using a barrel made of a material that degrades in sunlight or using weak fittings that can leak or break over time. Ensure that the materials used are suitable for outdoor use and can withstand the elements.
By avoiding these common mistakes, you can maximize the effectiveness and longevity of your rain barrel system, allowing you to collect and utilize rainwater efficiently.

With Earth Month almost over, it’s not too late to commemorate the occasion. In fact, it’s never too late to raise environmental awareness and look for more ways to save the only planet we have. Conserving water by investing in a rain barrel system is not only an excellent way to protect and save the environment but also a great way to reduce your overall water consumption and save money on your utility bills.
We hope this comprehensive guide on how to build a rainwater collection system will take you on a wonderful journey of environmental awareness. With a little knowledge, effort, and the right materials, you can build your very own rain barrel system in no time! And if you wish to learn more planet-saving tips, don’t hesitate to visit Gentleman Pirate Club.
Just a disclaimer – We have partnered with these companies because we use their products and/or proudly trust and endorse them – so we do receive a commission if you make a purchase or sign up for services. Often, we are able to negotiate special discounts and/or bonuses, which we will pass on to you via our links. We often get short notice on sale items available for 24-48 hours as we will pass these savings on to you.