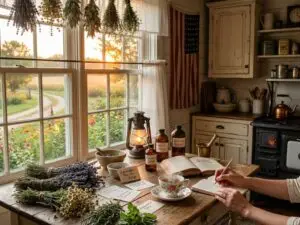


Canning is a time-tested method of food preservation that has been used for centuries to extend the shelf life of various foods. From fruits and vegetables to soups and sauces, canning offers a convenient way to store and enjoy seasonal produce year-round. Whether you’re a seasoned home cook or a beginner in the kitchen, understanding the basics of canning can empower you to preserve your favorite foods and reduce food waste. In this blog post, we’ll cover everything you need to know about canning, from the equipment required to the step-by-step process.
A Short History of Canning
Nicolas Appert, a French confectioner, is the genius behind canning. Appert invented the food preservation process in 1810, a good 15 years after Napoleon Bonaparte offered a reward of 12,000 francs to anyone who can figure out how to keep food fresh to help sustain his army that was busy conquering Europe.
Appert discovered that sealing food in airtight glass jars and subjecting them to heat killed bacteria and other microorganisms thus preventing spoilage. The problem with his method was that the glass containers tend to explode.
Around the same time, Peter Durand patented the use of tin cans for food preservation, a method invented by French engineer Philippe de Girard. This resulted in longer shelf life and easier storage and transportation making canning more practical and commercially viable.
In the mid-19th century, French chemist Louis Pasteur discovered pasteurization, a method of heating food to a specific temperature to kill harmful bacteria. This paved the way for further improvement in the safety and efficiency of canning.
From then on, canning factories started to emerge, utilizing machinery and automation to streamline the process. Over time, technological advancements continued to improve the quality and safety of canned goods. And while canned goods are readily available in stores nowadays, many homeowners are getting into canning as a hobby. Home canning has become increasingly popular due to its convenience, cost-effectiveness, and health benefits.
[lookbook id=”88421″]
Why You Should Take Up Home Canning
We’ve touched on some of the benefits of canning but let’s take a more detailed look at why home canning is a worthwhile hobby or activity.
It extends the shelf life of food
Canning significantly prolongs the shelf life of food by limiting the growth of microorganisms and other bacteria that cause spoilage. This means you can store canned goods for months, or even years depending on the type of food.

It preserves flavor and nutrition
Canned foods are usually indistinguishable from their freshly prepared counterparts in terms of taste and nutritional value. The heating process helps maintain the flavor and texture of the food while the airtight seal helps keep the quality and nutritional content intact.
It’s important to note that while canning preserves the taste and nutritional value of many foods, some heat-sensitive nutrients may degrade a little during the process. Still, canning is considered one of the most reliable food preservation methods without significant loss of overall nutritional value.
It preserves seasonal and local food
Canning allows you to preserve the flavors of seasonal fruits and vegetables at their peak ripeness. This means you can enjoy your favorite produce throughout the year, even when they are out of season. It also enables you to support local agriculture by preserving locally grown foods.
It reduces food waste
Canning is an excellent way to reduce food waste. It enables you to preserve surplus or leftover food that might otherwise go unused or spoil. By canning excess produce or leftovers, you can extend their shelf life and prevent them from ending up in the trash.
You can save money
Canning can save you money in a number of ways. First, you don’t need to buy tomato sauce, ketchup, jams, and other canned foods at the grocery store anymore since you can make them yourself. Store-bought canned products are more expensive so you save some if you can your own food.
Also, you can buy food in bulk and can them at home. Buying in bulk, especially when the product is in season, is cheaper than buying a few of the same items at a time. If you can buy them in bulk from the local farmer’s market, then you can save more. It gets even a lot more cost-effective if you grow your own food and can them yourself.
When you buy from grocery stores, you also spend on fuel or fare unless you live close enough. Having your own canned goods at home eliminates this cost. Even if you don’t leave your home and order the items online, you still have to pay for delivery charges. This is something you don’t have to worry about when canning at home.
You can turn it into a business
If you’re looking for some extra income, selling your canned goods is a good option. Many people love homemade and local products so there is a large market for them. But first, you need to perfect your products. Once you’ve got the canning part down, you can explore ways to market and sell your products.

Make sure to follow safety regulations so your potential buyers will trust your products. You also need to create a brand so that your products will stand out from the competition. Start by selling them to relatives, friends, and neighbors. You can sell them at farmers’ markets or the local grocery store. Eventually, you can even sell them online.
Canned foods are great gifts and bartering items
Canning also makes great gifts. A basket filled with your own homemade jams, jellies, and sauces is a thoughtful and unique gift for food lovers. Your canned goods will show off your creativity and thoughtfulness, while also providing your friends and family with delicious treats they can enjoy.
Home-canned foods can come in handy if you don’t have cash to spare as you can use them to barter or trade for other things you may need. When SHTF, money will have no value. The only way to “pay” and “get paid” is to trade jars of pickles, jam, and some homemade tomato sauce for a carton of eggs or a few hours of labor. Seems like a good deal, right?
Also, this is another good way to save money. By giving your homemade products as gifts or payment, you don’t have to spend actual money.
It helps build your prepper pantry
Canning is a good hobby to have if you’re a prepper. Stockpiling emergency food is a vital part of prepping and canning your own food is a great way to supplement and further build your prepper pantry. With a good stockpile of canned goods, you can be sure that you and your family won’t go hungry in times of disaster or emergency.

Compared to pre-canned goods that you buy from stores, your homemade canned foods have a shorter shelf life. While the former lasts for years, with some still edible after 10 to 20 years, your jars of preserved food can last for up to a year or two.
To make the most out of your efforts, it’s best to consume your home-canned goods before they expire and replace them with more home-canned goods. So while you’re doing this cycle of consuming and replacing, the rest of your emergency food stays untouched for many years or until you need to consume them as well.
It’s convenient and accessible
Canned foods are readily available and convenient to use. They can be stored in a pantry or cupboard, requiring no refrigeration until opened. This makes canned foods an excellent option for emergencies, camping trips, or situations where fresh food may not be easily accessible.
It gives you control over ingredients and additives
One reason why many people are getting into canning is that they’re becoming more conscious of the ingredients and additives in commercially processed foods. When canning your own food, you have control over what you put inside the jar. That means you don’t have to worry about potentially hazardous ingredients like preservatives and other additives.
Canning also allows you to tailor recipes to your preferences and dietary needs. You can adjust the amount of sugar, salt, or spices according to your taste. This flexibility is particularly valuable for individuals with specific dietary requirements or restrictions.
It’s good for the environment
Compared to processed foods, canning your own food is more sustainable. You know what goes into the jar, so you can make sure that all of the ingredients are organic and locally sourced. And of course, by reducing your reliance on processed foods, you reduce your overall carbon footprint as well.
Once you’re done canning and storing your goods, you can reuse the jars to make more preserved food. You can also repurpose them if you wish. When you buy canned goods, more often than not, the empty cans end up in the trash, which is not an ideal situation for the environment.
It’s a great hobby
Canning is more than just about preserving food for later use. It’s a great hobby that can be enjoyed by people of all ages and skill levels. It’s a fun and rewarding activity that you can do with your family or friends. And who knows, you might even come up with some unique recipes along the way!
What You Need to Get Started with Home Canning
A. Necessary Equipment and Supplies
To can food at home, you will need a few essential tools and equipment. Here’s a list of items typically required for home canning:
1. Canning Jars
Choose jars specifically designed for canning, such as Mason jars or Ball jars. Ensure they are free from cracks or chips, and that the lids are in good condition. The size and quantity of jars depend on the amount of produce you wish to can.
2. Canning Lids and Bands
Use new canning lids for each canning session. Don’t reuse the snap lids since they’re meant for one-time use. Screw bands can be reused as long as they are in good condition.
3. Water Bath Canner or Pressure Canner
The type of canner you’ll need depends on a few factors. One is the food you want to preserve. For foods that are high in acid like tomatoes and oranges, you should use a water bath canner. If you’re preserving low-acid foods such as limes and blueberries, you need a pressure canner. Foods that need a higher temperature during the canning process also require a pressure canner.
Another factor is the stovetop that you have. If you’re using an electric stovetop, you’ll need a water bath canner with a flat bottom. For gas cooktops, you need a canner with a flat/ridge base while induction stoves require a canner with a magnetic base. Water bath canners come in different sizes so that’s another thing to consider. Choose one that can accommodate the number and size of the jars you’ll be working with.
4. Canning Rack
A canning rack keeps jars off the bottom of the canner and allows water to circulate freely around them. Without a canning rack, your jars are in direct contact with the bottom of the canner. This is not safe since the bottom can get really hot fast, which can cause the jars to crack.
5. Canning Tongs or Jar Lifter
Canning tongs or jar lifters enable you to lift hot jars in and out of the boiling water without burning your hands and arms. They also help reduce the risk of dropping the jars and breaking them.
6. Canning Funnel
This funnel has a wide mouth and fits into the opening of the jars, making it easier to fill them without spilling or contaminating the rims.
7. Bubble Remover and Headspace Tool
A bubble remover, such as a plastic or wooden utensil, is used to remove air bubbles trapped in the jars. A headspace tool ensures the proper amount of space (headspace) is left between the food and the lid.
8. Clean Dish Towels and Hot Pads
These are needed to handle hot jars and equipment safely and to protect surfaces from heat.
9. Kitchen Utensils
You’ll need standard kitchen utensils like knives, cutting boards, mixing bowls, measuring cups, and spoons for preparing and processing the fruits and vegetables.
10. Ingredients
Before starting the canning process, make sure you have all the ingredients you need. Aside from the fruits and vegetables, you’ll need additional ingredients like sugar, vinegar, herbs, spices, or syrups for preserving and flavoring.
11. Canning Recipes and Guides
The evil scientist in you may be tempted to experiment with different combinations of ingredients. When it comes to canning and preserving food, that may not be a good idea. Go with tried and tested recipes instead. Pick up some canning recipe books or guides and try the easier ones first. Once you’ve got the hang of it, you can move on to more complicated canning recipes.
B. Safety Guidelines and Precautions
When canning at home, it’s important to follow safety precautions to ensure no harm will come to you or your property. These safety guidelines will also make sure that you don’t end up with canned foods ruined by bacteria and other contaminants. If you’re not careful, you may accidentally consume these contaminated foods, which can become a health hazard. So be sure to read up on the safety precautions before starting your home canning projects. Here are some basic safety tips when canning at home:
- Follow the manufacturer’s instructions when using a canner and other equipment
- Wear protective gear such as gloves, aprons, and safety glasses
- Make sure all jars are sterilized to reduce the risk of contamination
- Use proper equipment and tools
- Use approved canning recipes and follow the instructions carefully
- Use correct processing methods for the type of food
- Monitor processing times and temperatures
- Keep your hands and workspace clean
- Discard any spoiled or contaminated canned foods immediately
- Always label cans with the contents and date for future reference
[lookbook id=”88423″]
How to Can Food At Home
Here is a general step-by-step guide on how to can fruits, vegetables, and other foods:
1. Prepare your equipment and tools
Make sure you have everything you need prepped and ready to go before starting the canning process. It’d be difficult to move forward if you forget something or you spot some dirt on your equipment or tools. This may disrupt the process and potentially ruin your canned goods.
2. Choose your recipe and prepare the ingredients
Choose a reliable, tested canning recipe from a trusted source. Read and understand the instructions thoroughly so you don’t have to keep looking at the recipe. But keep it close so you can always check if you’re doing things right.
Prepare the ingredients of your chosen canning recipe. You should use fresh produce to get quality results so harvest or buy the ingredients you need right before canning. Don’t forget to wash, peel, and chop the produce as required by the recipe.
3. Prepare the jars and lids
Wash the jars, lids, and bands with hot, soapy water then rinse them well. Make sure to sterilize your jars properly by placing them in a pot of boiling water. Keep them submerged for 10 minutes. After sterilizing, remove the jars with a jar lifter and place them on a rack or clean cloth to drain.
There’s no need to boil or even pre-warm the lids and bands. Just place them on a clean surface and within reach for when you need them.
4. Fill the jars with the prepared ingredients
Use a wide-mouth canning funnel to carefully fill the hot jars with your prepared food. Make sure not to overfill or spill any of it. Leave the recommended headspace as indicated in the recipe, usually at least a quarter inch of space from the top of the jar. This is where you’ll add in some extra liquid to help create a vacuum.
5. Remove air bubbles
Slide a bubble remover or headspace tool along the sides of the jar to remove trapped air bubbles. Wipe the rims of the jars with a clean, damp cloth but be careful since they’re still hot.
6. Secure the lids and bands
Place a lid on the jar then screw on a band until it’s fingertip tight or tight enough not to let some of its contents leak out. But be careful not to screw them too tightly. If your recipe requires more processing time than normal canning, you may need to use two-piece lids instead of regular flat lids. Two-piece lids are necessary for air to escape during boiling or pressure canning.
7. Process the jars
Fill the canner with enough water to submerge the jars. Bring the water to a rolling boil then place the canning rack inside the canner. Use a jar lifter to lower the filled jars onto the rack. Make sure the jars are upright and not touching each other. Add more boiling water if needed, making sure the water level is above the jars.
Maintain a steady boil throughout the entire processing time. Monitor and maintain the temperature of your canner to avoid underprocessing or overprocessing.
9. Remove the jars
Once the processing time is finished, turn off the heat and remove the canner lid. Allow the jars to sit in the canner for a few minutes to settle. Then, carefully remove the jars from the canner using the jar lifter. Place them on a towel or cooling rack, leaving space between each jar.
10. Cool and test the seals
Let the jars cool undisturbed for 12 to 24 hours. As they cool, you should hear a “ping” sound, indicating that the jars have been sealed. Afterward, press the center of each lid to ensure it is concave. If it doesn’t move or make a popping sound, then you’re good to go. If it does, it means the jar is not sealed. It needs to be refrigerated or reprocessed.
11. Double-check the jars for contamination
Once the jars have cooled and the seals are confirmed, check them for signs of contamination. You should be looking for any discoloration, odors, or unusual bubbling. If there are contaminated jars, discard them immediately. Don’t taste or use the food from such jars, as it could be a health hazard. Be sure to wear protective gloves when handling the contaminated jars. Also, make sure the contaminated jars are placed in a sealed container and disposed of properly according to local regulations.
12. Label and store
If all is good, label the jars with their contents and date canned. Store them in a cool, dry space away from direct sunlight. Any jar that gets exposed to extreme temperatures should be discarded as it will no longer be safe for consumption.

Canning is a worthwhile hobby, a valuable supplement to your pantry, and a potential source of income. Plus, it’s a great way to enjoy healthy food all year-round. With this blog post, we hope you’ve learned everything you wanted to know about canning but were too afraid to ask. Now that you’ve got a good idea of the process, why not get started? Canning can be a rewarding experience and you’ll never know until you give it a try. And don’t forget to check out Gentleman Pirate Club to learn more about home canning and other ways to become more self-sufficient.
Just a disclaimer – We have partnered with these companies because we use their products and/or proudly trust and endorse them – so we do receive a commission if you make a purchase or sign up for services. Often, we are able to negotiate special discounts and/or bonuses, which we will pass on to you via our links. We often get short notice on sale items available for 24-48 hours as we will pass these savings on to you.