Not everyone has the luxury of owning a wide parcel of land for farming or gardening. Even if you live in a high-rise apartment or in the middle of the city, you can still reap the benefits of having a garden of your own. You don’t need a lot of space to start an edible container garden. Just be creative and resourceful when planning your garden and deciding what vegetables, herbs, and other plants to grow. read on to learn more about edible container gardening.

Benefits of Container Gardening
If you still have reservations about edible container gardening, this list of benefits may just push you to start using pots instead of digging up your whole yard.
1. You can grow your garden anywhere as long as it’s on your property. You can grow an edible garden on your porch, patio, driveway, or even on your window sill.
2. You can grow many plants in a small area. Since you have limited space to start with, container gardening is definitely the way to go because you can maximize every cubic inch of space available for planting vegetables and herbs. With separate containers, you can also grow different kinds of plants even those that don’t grow well beside each other in the ground.
3. Container gardening doesn’t require as much maintenance as growing plants directly into the ground. That means no weeding or digging. You’ll have more time to do other things, though you still have to water the plants while talking to them.
4. You can buy pots in any shape and size, giving it a more personal touch than digging up the entire yard.

5. Your garden is basically portable. You can take your plants wherever you feel the need to take them. You probably shouldn’t bring them along on your vacation to another country but you can easily take them with you if you’re moving to a new place. Also, if you’re growing your plants indoors, you can move them to a spot that gets the most sun. You can also bring your pots and containers outside to get more sun time.
6. Perhaps the most important benefit of an edible container garden is that you’ll have a food source that you’ve grown yourself. As long as you keep your container garden thriving all year round, you’ll have an ample source of vegetables and herbs you’ll need to prepare your meals. This will also lessen your expenses since you don’t have to buy them in stores at high prices.
7. Gardening is a relaxing hobby to have. It’s also good for your mental health. In fact, many people got into container gardening during the pandemic. It gave people something to do to help keep their minds off what’s happening around the globe.
What You Need to Start Your Edible Container Garden
Before you start growing your own vegetables and herbs in containers, there are a few things you need to get your hands on first.
1. Seeds or Seedlings
You can purchase seeds or seedlings at your local garden center, but many of the best vegetables and herbs require weeks of growth before they are ready to be transferred into a container. If you want an established plant in time for spring, buy seedlings. If you have time to wait for it to grow yourself, start with seeds.
You can also grow a number of plants using scraps. Celery, for example, can be regrown from the base or root part. Save the base after cutting off the stalk with leaves. With the stalk part facing up, place the base in a container with warm water. Submerge about an inch of the bottom in the water. The celery will regrow and be ready for transplanting in about a week.
2. Containers
Speaking of containers, you can use just about any size and shape for your edible garden. It will partly depend on the available space you have. If you only have a small deck or front porch, for example, using three-gallon containers is better than five-gallon ones.
Since all the nutrients the vegetables and herbs need come from their containers, look for sturdy pots that can hold up to moisture and soil. The best types to use for your edible container garden include pots made of clay or plastic. However, many people would rather not use plastic to help conserve the environment so you may want to skip purchasing new plastic pots or polyethylene plastic bags.

Aside from clay pots, the better options than plastic are potato bags, bushel baskets, wooden barrels, and planter boxes. You can also reuse plastic soda bottles, ice cream tubs, milk jugs, old tires, and similar containers. Just be sure that it has a drainage hole and is deep enough to hold a reasonable amount of soil for the plant you have selected.

3. Soil or Potting Mix
Organic soil is best for container gardening. You can get it inexpensively at your local plant nursery or garden center. You can also use regular soil from your yard if you want to be economical about it. It’s best to mix in a little sand and compost with the soil. Be sure to use soil that drains well. You don’t want the roots sitting in water all the time.
There are ready-made organic potting mixes already prepared in bags to help you out. Use a commercial potting mix or a soilless seed starting mix. Many prefer them because they are lightweight and drain well. These potting mixes usually have an ingredient to help the soil retain water and other nutrients for your plants, but they still drain well so the roots don’t sit in water all the time.
4. Gardening Tools and Supplies
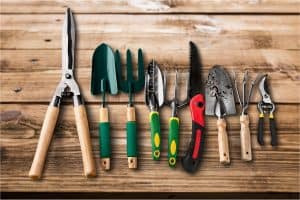
Now that you have your container, it’s time to get the necessary tools and supplies. The most basic gardening tools you’ll need are a hand trowel, soil scoop, hand cultivator, pruner, gloves, and watering can. You could also use a hand transplanter, micro-tip scissors, and plant labels.

How to Start An Edible Container Garden
Now for the fun part. Here are some easy steps to follow that will help you start your edible container garden.
1. Select the Right Place
Before putting all of your pieces together, you need to find a sunny spot in your home where it can receive at least six hours of direct sunlight each day. This is the ideal spot to set up your edible container garden.
https://www.youtube.com/watch?v=oZKMO487Ejc&ab_channel=RedditStorytelling
If you prefer an indoor container garden, you should still find the spot that gets the most sunlight. If your plants won’t get enough exposure to sunlight inside your home, you’ll need to take them out for their much-needed morning sun. But remember to bring them back inside before it gets dark or cold so they don’t get frostbite.
2. Pick Your Plants
While you can grow any plant in an edible container garden, some plants are more suited for this than others. Herbs like basil, oregano, or thyme work well because they don’t need a lot of water. Tomatoes and peppers are also good choices. You can even plant onions, leeks, or garlic in your container garden if you like.

Consider the size of your containers in choosing the plants and vice versa. You need to create contrast and balance. If you only have small pots, choose plants that won’t grow twice as tall or as big as the container. If you want to plant a specific vegetable or herb, choose the right container with regards to the plant’s size when it’s fully grown.
Also, the choice of plants and size of your containers may depend on the space available. You may not want to use large containers if you have little space to work with. If this is the case, you could use stackable or elevated containers to create a vertical garden.
3. Prep Your Container
If you’re reusing old pots or repurposing soda bottles and other containers, clean them out first. Use soap and warm water then rinse them well so there’s no residue left. If they have any cracks, now is the time to fix them.
Make sure your containers have proper drainage. If they came with a hole or drain at the bottom, you can plant directly into those without any further preparation. If not, you have to make the holes.
4. Add Soil and Fertilizer
Fill your pots with soil and organic fertilizer like compost as needed then mix them well. Make sure the tops of the soil always stay moist for your plants to grow and not dry out.
5. Plant Your Seeds or Seedlings
Once you’ve filled your container with soil and fertilizer, plant your seeds or seedlings. If you planted seedlings, make sure they are spaced about an inch apart. Also, make sure they are about an inch below the top of your pot before adding soil around them. For seeds, find the right depth to sow them in your container. Some plants prefer shallow sowing while others can go in much deeper. You may also need to thin out any seedlings that grow too close together.
6. Water Your Plants
Water your container garden whenever the top of the soil feels dry to touch. Depending on your region and weather conditions, this could be every day or every other day during summertime.
It’s important to water your container daily, but make sure you don’t overwater it either. You will need to find the right balance that allows the soil to dry out between waterings. Remember, containers dry out faster than regular ground soil.
Some plants are quite the opposite of others when it comes to watering. For example, tomatoes require consistent moisture while cucumbers need more dryness between waterings. If these conditions aren’t met, you may end up with problems like fungi or root rot.

8. Tend to Your Container Garden Regularly
Even after you’ve planted everything in your container garden, there’s still work to be done on a regular basis. Weeds aren’t much of a problem with container gardening though it’s still possible for them to grow beside your plants. Make sure to pull out those weeds as soon as you see them so they won’t compete for moisture, nutrients, and space with your plants and stunt their growth.
Clip away dead or dying flowers or leaves. Use pruning shears to avoid damage to your beloved plants. Take the time to clean your containers and surroundings, too. Gardening will be a more relaxing experience if everything is spic and span.
9. Harvest Your Produce
Before you harvest them, make sure all your plants are ready to be picked by learning the right time to harvest them. You also should know what their readiness indicators are. You may like to set a schedule for when things will be ready on the vine or on the branch so you’ll know when it’s time to start harvesting.
Some plants can be harvested by simply plucking out the parts you need. Others will be better off using the proper tools like pruning shears. You should learn these, too.
https://www.youtube.com/watch?v=GFbufdmv0MQ&ab_channel=COOLJOBSafety
10. Enjoy Your Edible Container Garden!
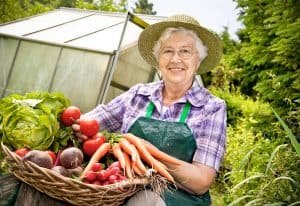
Once you’ve nurtured your container garden, you can relax and watch the fruits of your labor grow. It’s a very rewarding feeling to have something to eat from something that was once a little seed or a small plant in a small pot. If you enjoyed working on a container garden, why not try to start another one this year?

Tips for A Successful Edible Container Garden
Starting and maintaining an edible container garden can be difficult but it’s definitely fun and rewarding. To increase the chances of your plants thriving, here are some tips you can do:
1. Choose plants that are high-yielding and compact to produce the maximum amount of food per square foot.

2. Mix different kinds of plants with each other to promote biodiversity and increase nutrient availability for all plants involved.
3. Make sure to rotate your container garden regularly. This means changing the location of your plants either clockwise or counterclockwise periodically for even growth and development throughout the year.
4. Use DIY compost to keep your soil nutrient-rich and your plants healthy. To make compost at home, simply dump food scraps, dried leaves and grass, and other organic materials in a compost pot or bin then wait until they’re good to go.
5. Use a wheelbarrow or a similar device to move heavy containers. You’ll be surprised how heavy the pots can get once you fill them up with soil.

Edible container gardening is a great way to bring the outdoors inside and probably save some money on your grocery bill. It offers a unique and fun way to grow your own vegetables and fruits, in addition to flowers and herbs. Learn more about this container gardening and other practices over at Gentleman Pirate Club.


