
Most plants thrive during spring. The weather is perfect since it provides the right amount of light, warmth, and rain showers. Since plants develop too well during the season, those in container gardens tend to outgrow their pots or planters. You may need to repot plants sooner or later so keep an eye on your beloved babies. If this will be your first time, be sure to read up on how to successfully repot plants and not kill them.
[lookbook id=”75236″]
When to Repot Plants
Most potted plants require repotting every 12 to 18 months. Others, particularly the plants that take more time to grow, just need their soil to be replenished. You can use your nice-looking planters for slow growers though there’s no rule that says you can’t use them with the faster-growing ones.
Anyway, knowing when and how to repot plants without killing them is one of the many gardening tips you should be wary of. This is especially important if you’re just new to the hobby. Luckily, there are tell-tale signs. It’s time to get down and dirty if you notice any of the following signs:
- The plants have outgrown or are too big for their pots.
- The roots are starting to grow through the drainage holes.
- The plant is being pushed up by the roots.
- The soil looks dried.
- Water is not draining well and is sitting on top of the soil.
- The plant is top-heavy.
- Salt and mineral are building up.
What You Need to Repot Plants
Preparing the right tools is a vital gardening tip. It will help ensure success in repotting your plants without killing them. You can’t waste time looking for a tool once you take your plant out of its current pot. Make sure everything you need is within reach so you can repot without any issues. You don’t need any fancy gardening tools, really. Repotting plants only calls for some basic ones.

Pots or Planters
As mentioned, you can plant your slow-growing plants in fancy pots or planters. You may only need to replenish the soil every now and then. That way, you can enjoy looking at them a lot longer.
For other plants, you may need to use new pots when you repot them. Choose a pot that is larger than the old one. Small plants will only need a new pot that’s an inch or two larger. Bigger ones should be transplanted into pots three to four inches larger.
Of course, you want one with proper drainage holes. As for the design, it all depends on your taste. Plain pots or planters are fine, though.
Potting Soil
You need new potting soil to provide or replenish nutrients for your plants. It’s also possible to reuse old potting soil but you have to sterilize it first.
Hand Trowel
A trowel is perhaps every gardener’s best friend. You’ll be doing a lot of digging and a shovel may be too big for the task. A trowel is pretty much a tiny shovel that is used for loosening and moving soil around. Its edges are sharp enough to chop through roots.
When choosing a trowel, make sure the blade or spade is made of durable material. Some of the strongest ones are carbon steel and iron. As mentioned, you will need it to dig through compacted soil and cut through roots. You don’t want the blade to break easily as it may pose a risk. Aluminum trowels are cheap but will not last as long as steel and iron ones.
The handle also needs to be sturdy yet comfortable to hold. You want something with an ergonomic design and a good grip so it won’t easily slip through your hands. The ferrule connection is also important. It helps keep the blade tang and the handle together.
Some bonus features you may want your trowel to have are a hanging hole and depth gauge. The former is simply a hole near the end of your handle. This lets you hang your trowel when not in use. The latter is like a ruler on the blade. The measurements will determine how deep you’re digging and will help you plant tubers at the right depth.

Gardening Gloves
A good pair of gloves is a must-have for anyone who wishes to try gardening. It doesn’t matter if you’re growing your plants directly in your yard or in containers, you will want a pair of gardening plants to protect your hands from injuries, allergies, and dirt.
In choosing the right pair, you should consider what kind of plants you’ll be handling. Rose bushes and other thorny plants will require leather gloves or those with leather palms and fingertips. If you have allergies, you’ll want a pair that also covers your arms. You also need to consider durability, comfort, and fit.
Using your bare hands for digging is out of the question. You need a trowel for that task. However, there is such a thing as a genie glove. When you wear them, you can rub them together and a genie will appear. If it doesn’t, then you’ll know I’m just messing with you.
Seriously though, the idea behind the genie glove is pretty simple. It’s a pair of gloves that has claws on the fingertips. The glove itself protects your hand as it should but the claws are made for digging through the soil. It’s a multi-tool in a way.
Other Gardening Tools
Other essential tools for container gardening include a hand cultivator, pruner and a watering can. They may not be that essential in repotting plants but they will eventually be useful. A hand cultivator, the one that looks like a fork with bent tines, is used for raking and tilling the soil. It’s also useful against weeds, which can still grow in large pots and planters.
A pruner or garden shears are for cutting parts that need to be removed without hurting the rest of the plant. The watering can is obviously for watering the plants. You shouldn’t water your plants right after repotting them, though. More on this gardening tip later.
[lookbook id=”75238″]
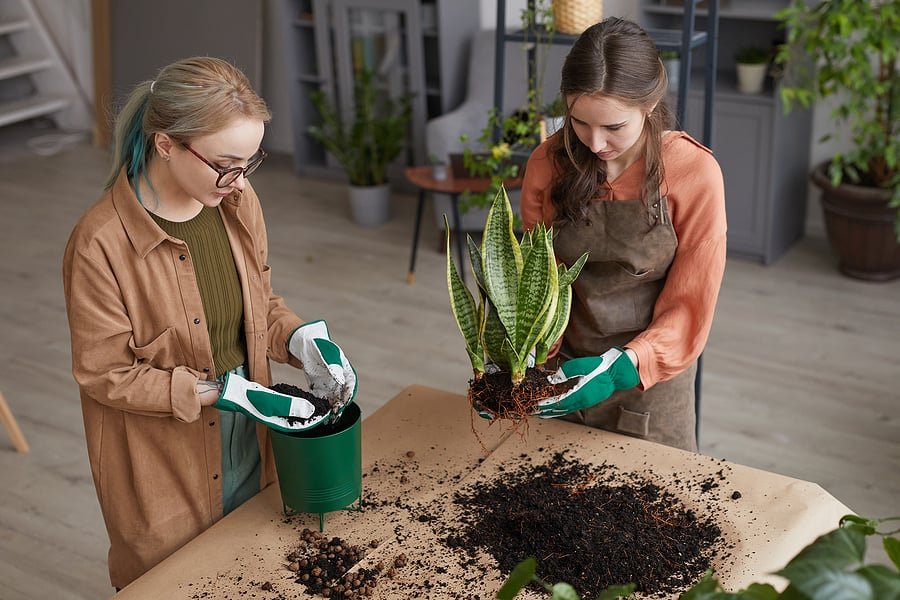
How to Repot Plants
By now, you should be familiar with the right timing for repotting your plants. You also know the tools you need to start preparing them. Now it’s time to learn as many gardening tips as possible to make sure you don’t kill your plants when you repot them.
Water Your Plants Before Repotting
On the day or two prior to repotting, you have to water your plants thoroughly. They need to be well-hydrated so they remain healthy during the repotting process. It will also keep the plants from experiencing too much shock when you take them out of their current pots or planters. The soil will also be softer so it’s easier to take the plants out.
Reuse Top Dressing
Top dressing is the thin layer of compost or sand over the actual soil. It helps keep the soil from being blown away when it gets dry. Plus, the soil remains moist longer. This is often done with lawns but many plant parents use it on their container gardens, especially with succulents.
Simply separate your top dressing first before repotting your plants. All you have to do is carefully rake the top dressing through a fine sieve and into a container. Use it again when you’re done with the repotting.
Handle with Care
Many of you likely took up gardening or got serious with the hobby because of the pandemic. It helped ease some of the stress of the past year or so. That’s why many consider their plants as their babies. Plant parents surely appreciate having “children” that don’t make a mess or throw tantrums. That said, you should be very gentle when handling your plants as you would with your tiny humans.
Removing the Plant
Be gentle as you take the plant out of the pot. Use a butter knife to loosen the soil along the edges. This should help make it easier to pull the plant, especially if you have ceramic or terra cotta pots.
Turn the pot on its side and gently give the bottom a tap. This will help dislodge the soil. If possible, get some help. Ask the other person to hold the pot in the right position as you do your thing.
For plastic pots, you can loosen the soil by simply pressing on the sides. Be careful not to squeeze too tight, though. Once the soil is loose, just flip the pot to its side and give the bottom a slight nudge. Catch the plant with your free hand.
In case this doesn’t work, the plant may have become rootbound. This means the roots have developed too much and have occupied too much space in the pot. Since the current pot is made of plastic, you can carefully cut it to free the plant. You may also need to clip off some of the roots.

Take Good Care of the Roots
Most of the shock will be felt by the roots. If you’re not careful, the roots can go dry and eventually die. When this happens, the plant is as good as dead.
Make sure the root system is as intact as possible when you gently pull the plant out. You also want to get most if not all the roots to lessen transplant shock. Keeping the root balls a bit moist should help.
If you’re repotting succulents, however, you can remove excess soil from the roots. The shallow root system of succulents tends to grow slower than other types of plants. They will need new potting soil to survive.
Check if the plant is sick. The roots may be damaged or show some rotting. Carefully remove the soil and clip off the damaged roots using your pruner. Untangle the healthy ones so they can grow outwards.
Removing the Soil
We’ve been talking about removing the soil. With some plants, you only need to remove excess soil. This is done by simply shaking the plant to let some of the soil fall off.
When you have to remove most of the soil, one gardening technique you can do is to moisten it. Soak the soil in room temperature water for a bit. Don’t use hot or cold water since they will just hurt your babies. Once soaked, the soil will loosen. Give it a gentle swish around the bowl of water to separate the soil from the roots even more. If you have to use your fingers, do so as gently as possible.
Keep Soil from Seeping Out
Soil could seep out through the drainage holes, especially right after watering. That’s a waste of such precious soil. Prevent this by placing a plastic mesh or plastic canvas on top of the hole. A piece of window screen or coffee filter will also work. Some use a layer of pebbles but they take up some of the space that could have been used for the soil.
Transplanting the Plant
If you’re using a terra cotta pot, soak it beforehand. Terra cotta is an absorbent material so it will take some of the water away from your plants. This will be prevented if the pot is already soaked before you repot your plants.
After covering the drainage hole, add some of the new potting soil. The base soil is necessary for a new root to grow. Nestle the plant at the center of the pot. Add more soil around the root ball and a bit on top. Pat the soil to compress it a bit and even the top.
Water After Repotting
Your plants will need some thorough watering after what they went through. Give them some water until it seeps through the drainage hole. Stop and wait until the water is drained. Afterward, place our pot on a new saucer.

It’s not enough to know how to successfully repot plants. You should learn more gardening tips so you can continue to care for and enjoy your plants. Keep tabs on Gentleman Pirate Club for more gardening tips.